|
|
First time I saw the book of Junko’s at Mbak R’s house, I thought how on earth could you make that. Then I saw it again on her blog. She never failed to amaze me again and again. And I can sense her contribution in this month’s challenge because all of a sudden we have to make this. But if it’s not because I had to I don’t think I would make it. Was already threatened by the complicated look of it. At first when reading the recipe, immediately gotten a headache. Needed more than 3 times to read the recipe to finally get where everything goes and when.
The cake was typical Asian cake, very moist and soft. Somehow I find the filling of whipped cream and mandarine oranges complemented the taste and texture of the cake. Will I make it again? If it was not that complicated I might. Hehehe.
.JPG)
Ingredients:
Batter 1:
– 4 egg yolks
– 40 gr caster sugar
– 40 ml oil
– 60 gr water
– 80 gr all-purpose flour
Batter 2:
– 60 gr (from +/- 2 eggs) egg whites
– 15 gr caster sugar
– 10 gr cornstarch
Batter 3:
– 160-175 (from 5-6 eggs) egg whites
– 0.5 gr salt (I used 1/4 tsp)
– 50 gr caster sugar
– 1 tsp lemon juice
– 15 gr cornstarch
– I added 2 tsp lemon gel in the batter for flavouring
– Food colouring(s)
– 2 9×9 baking pans (22,5cm)
– thickened cream (and/or nutella, cake crumbs, sliced fruits, canned fruits, etc.) for filling
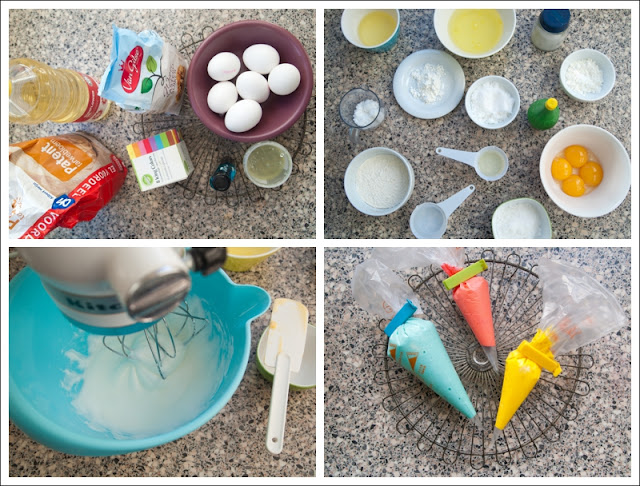
Directions:
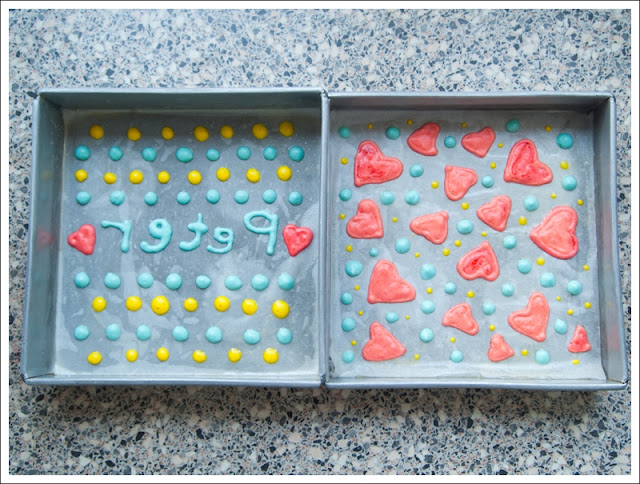
1. Cut two 9×9 greaseproof paper and draw patterns on each of them. (I didn’t do this, I just did it free handedly). Lightly grease the baking pans, then place the greaseproof paper on the baking pan. Then lightly grease the greaseproof paper. Preheat oven to 165-175C.
2. Prepare batter 1: in a medium or large bowl, beat together yolks and sugar on high speed until thick and pale. Add oil and beat on medium-low speed until blended. With the mixer still on medium-low, add water and mix thoroughly. Lastly, add flour and mix until just combined.
3. Rinse beaters and prepare batter 2: Beat egg whites and caster sugar until soft peaks form. Add cornstarch and beat until mixed throughly.
4. Add 5-6 Tbsp of batter 1 into batter 2. Add food colouring, or divide batters into any number of colours you wish to use and colour them differently. Then start painting on your greaseproof paper. Place painted pan in the freezer.
5. Prepare batter 3: beat egg whites, salt, caster sugar, and lemon juice until soft peak forms. Mix in cornstarch.Mix batter 3 with remaining of batter 1. If you want to colour the cake, add in food colouring now. Mix with a metal spoon a few times to lighten the batter, then add the rest of batter 3. Mix lightly until just combined.
6. Take pan out of freezer. Pour batter and spread evenly. Bake 20-25 minutes or until toothpick test comes out clean. Cool on pan for 5 minutes, then invert onto another baking paper. Peel baking paper and discard.
7. When the cake has cooled, prepare filling. I used whipped cream with mandarine oranges. Spread filling evenly, then roll, using the baking paper as guide. Serve.

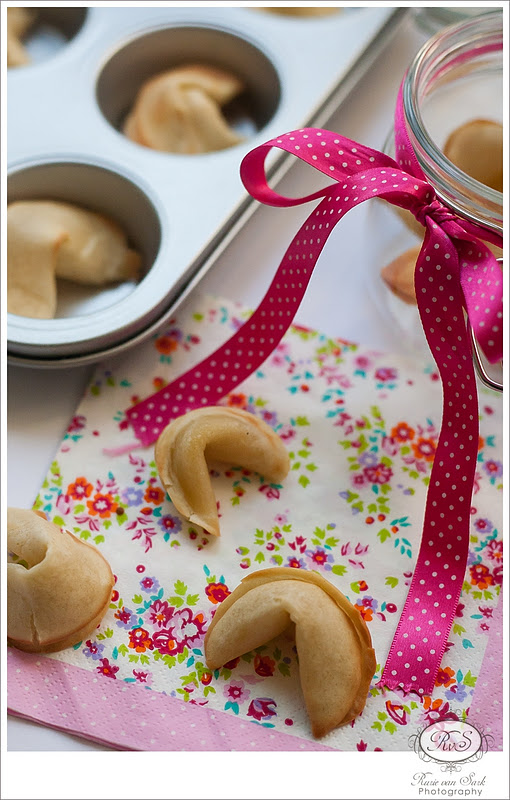
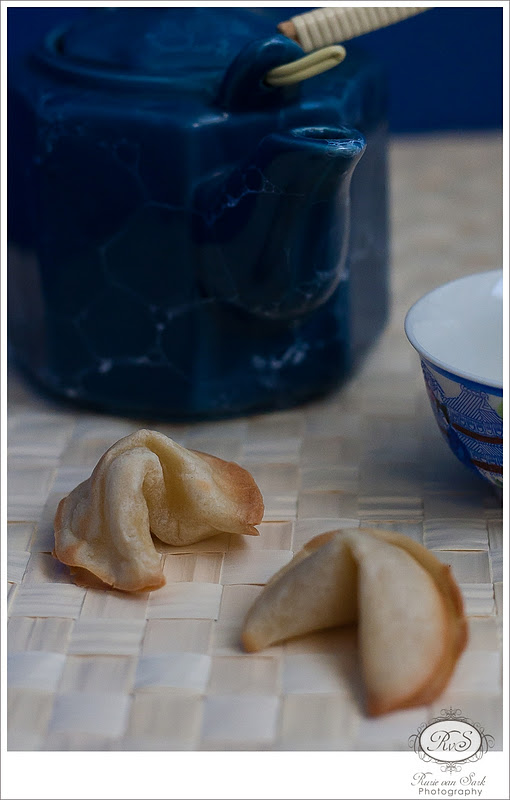
Don’t tell me you’re never wanted to put your on fortune whenever you eat this at your favourite Chinese place? Well now you can make it in your own kitchen and feel free to make any kind of fortune you want. Although pay good attention to the direction because I didn’t that’s why mine was rather thick which resulted I couldn’t fold them nicely. And when I did fold them they sort of crack….oh well it all made up with the taste, they surely tasted very nice. Good luck in making them.
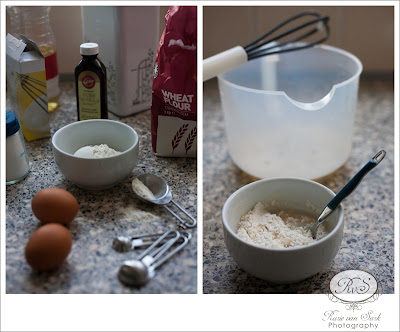
Prep Time: 15 minutes
Cook Time: 15 minutes
Total Time: 30 minutes
Ingredients:
– 2 large egg whites
– 1/2 teaspoon pure vanilla extract
– 1/2 teaspoon pure almond extract
– 3 tablespoons vegetable oil
– 8 tablespoons all-purpose flour
– 1 1/2 teaspoons cornstarch
– 1/4 teaspoon salt
– 8 tablespoons granulated sugar
– 3 teaspoons water
Preparation:
– Write fortunes on pieces of paper that are 3 1/2 inches long and 1/2 inch wide. Preheat oven to 300 degrees Fahrenheit. Grease 2 9-X-13 inch baking sheets.
– In a medium bowl, lightly beat the egg white, vanilla extract, almond extract and vegetable oil until frothy, but not stiff.
– Sift the flour, cornstarch, salt and sugar into a separate bowl. Stir the water into the flour mixture.
– Add the flour into the egg white mixture and stir until you have a smooth batter. The batter should not be runny, but should drop easily off a wooden spoon.
Note: if you want to dye the fortune cookies, add the food coloring at this point, stirring it into the batter. For example, I used 1/2 teaspoon green food coloring to make green fortune cookies.
– Place level tablespoons of batter onto the cookie sheet, spacing them at least 3 inches apart. Gently tilt the baking sheet back and forth and from side to side so that each tablespoon of batter forms into a circle 4 inches in diameter.
– Bake until the outer 1/2-inch of each cookie turns golden brown and they are easy to remove from the baking sheet with a spatula (14 – 15 minutes).
– Working quickly, remove the cookie with a spatula and flip it over in your hand. Place a fortune in the middle of a cookie. To form the fortune cookie shape, fold the cookie in half, then gently pull the edges downward over the rim of a glass, wooden spoon or the edge of a muffin tin. Place the finished cookie in the cup of the muffin tin so that it keeps its shape. Continue with the rest of the cookies
Source : www.chinesefood.about.com
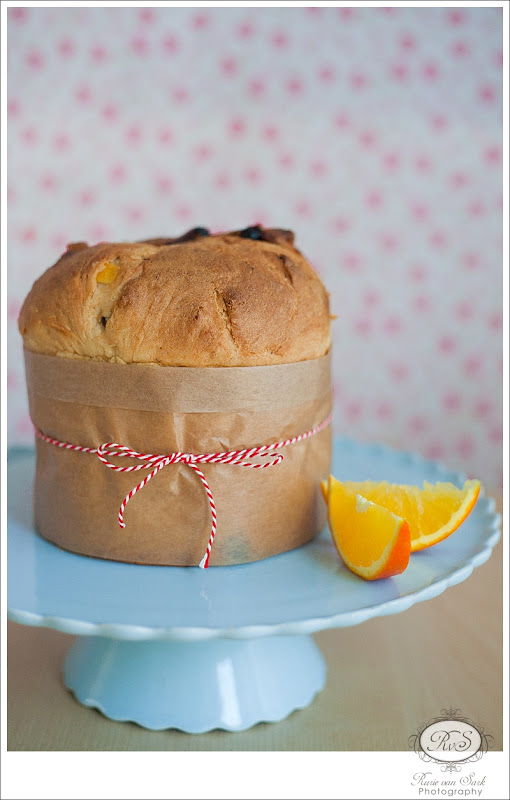
Christmas is (almost) here. Time goes by so quickly when you’re having fun isn’t it. This assignment from KBB came right on time for christmas baking. The not so sweet bread with it’s rich texture added from the chopped peel and sultanas give pleasant taste despite the somewhat chewy texture. I would say that you should savour this Italian bread along with some butter spread on your christmas morning.
Ingredients:
– 1 1/2 cakes of fresh baker’s yeast (I used instant yeast 1 sachet 11 gr)
– 65 ml (1/4 cup) sugar
– 6 tbsp. warm water – 6 egg yolks
– Finely grated zest of 1 lemon
– A pinch of salt
– 500-750 ml (2-3 cups) flour (I used all purpose flour)
– 100 ml (6 tbsp.) diced candied peel
– 100 g (6 tbsp.) + 2 tbsp.butter
– 4 tbsp. sultanas
– 4 tbsp. currants (Didn’t use this)
– 1 tsp. vanilla
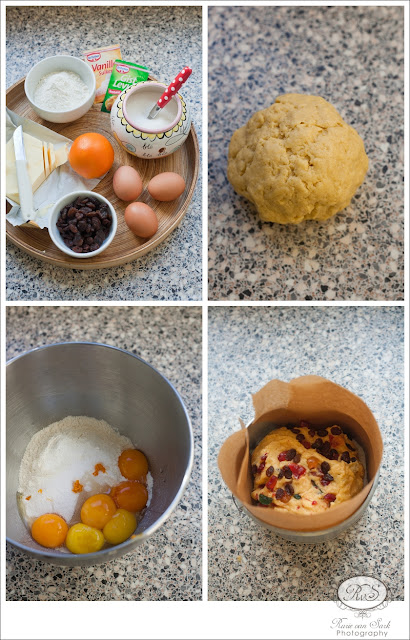
Directions:
– Sprinkle 1 tbsp. granulated sugar and the yeast over the warm milk and let sit 3 minutes; mix and let rest in a warm draft-free place (e.g., a warm oven that has been turned off) until the mixture has doubled in volume, approximately 5 minutes.
– Pour the mixture into a bowl, add in the egg yolks, vanilla, lemon zest, salt and remaining sugar; gradually mix in 500 ml (2 c.) of the flour by hand until a smooth consistency is attained – the dough should easily come together into a ball.
– Gradually add the butter cut into small dice and beat until the dough becomes smoother and more elastic; add 125 to 250 ml (1/2 to 1 c.) more flour until the dough is firm and silky but not sticky; place the ball onto a lightly floured surface. Knead the dough for approximately 10 minutes. When the dough is smooth and shiny, place into a buttered bowl; dust lightly with flour, cover with a kitchen towel and place in a warm draft-free place for about 45 minutes until doubled in volume.
– Punch down the dough firmly with your fist and flatten it out in the bowl; add the candied lemon peel, raisins and currants and knead until well distributed but without working the dough more than necessary; line a large bread pan with brown paper that has been well buttered on both sides; place the dough in the pan and trace a cross on top; – Cover with buttered paper and let rise again in a warm place for 15 minutes; remove the paper from the top; brush the top with softened butter.
Baking :
– Preheat the oven to 200°C (400° F)
– Place the bread pan on the middle rack of the oven and bake for 10 minutes
– Reduce the oven temperature to 160° C (350° F) and continue baking for another 30 to 40 minutes, brushing again with melted butter; the bread is done when the surface is golden and crispy
– Remove from the oven; remove the paper and let cool for 15 minutes before unmolding.
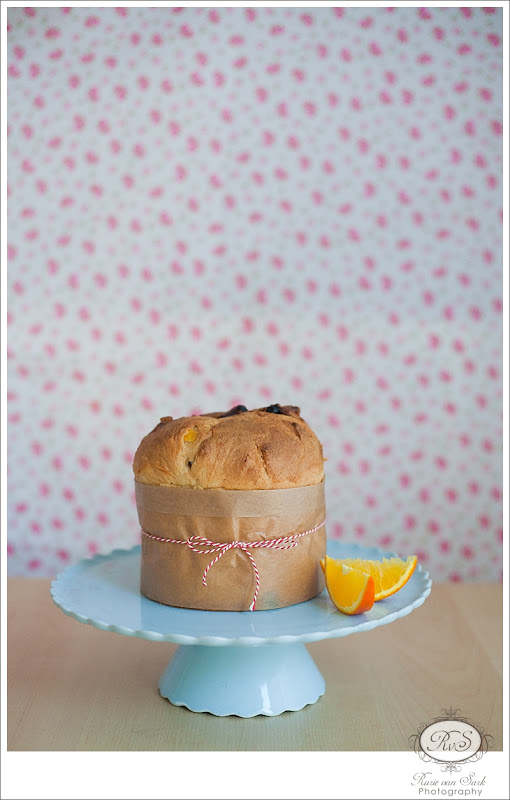
Source : The World Wide Gourmet

We couldn’t deny that snacking is a part of Indonesian eating culture. We like to snack in between meals, either would it be mid morning, mid afternoon or late at night. Therefore we can find snack vendors easily across the country. There are just so many kinds to suit your mood, from sweet pisang goreng (banana fritters), savoury bakwan goreng (vegetable fritters) to sweet and spicy rujak buah (mixed fruit with sweet and spicy sauce). With around 230 millions people to feed everyday we could be sure that there are enough choices to please every appetite.
You can find those street vendors selling yummy food 24/7. The so called street vendor is just a name, you could actually find them in many places. They could be either on the market, on the side of a street, in front of a closed shop late at night or even in front of your doorstep. How could one has a street vendor in front of his door step if you should ask? It’s because there are also various kind of ways to sell it ie; in a permanent space or with a cart pushed by the seller then he would make his way around the neighborhood.
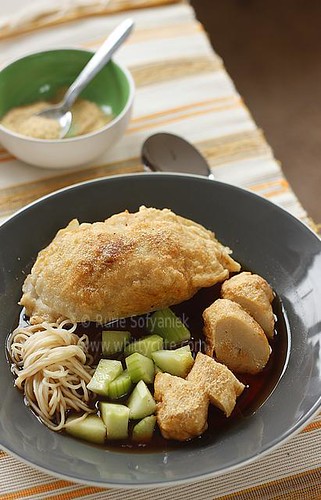
Since there are none of those food street vendors in this place (I mean not the Indonesian kind) I had to make it myself. One of my favourite snack of all time would be this Pempek Palembang or Mpek Mpek Palembang or Empek Empek Palembang. I first tasted it years and years ago in a local food court in Bali and yes I immediately liked the taste. It is made basically from sago flour, tenggiri fish fillet (spanish mackerel) then served with sweet and spicy sauce made primarily made from tamarind, palm sugar and bird’s eye chili. The savory taste of the fish cake marry nicely with the sweet, tangy yet spicy sauce. It’s seriously heaven.
This post is my contribution to this month’s Masbar with the theme Panganan Kaki Lima (Food ala Street Vendor). If you would like to participate in our event, there is still time until next week, please do visit our blog for more information.
But if you ask again why we named street vendor as kaki lima? Kaki lima literally means five legs, and those vendors with the cart usually has three legs on their cart and the other two legs would be the legs of the seller. Funny eh?
The recipe below belongs to dear blogger friend Mbak Ine Sena, I have tried some other recipes but so far hers is the best, thank you ya Mbak for sharing the recipe with us.
For the fish cake
Ingredients:
– 200 gr spanish mackerel fillet
– 150gr sago flour (I used tapioca flour)
– 1 tbsp tang mien flour
– 125 ml ice water
– 2 cloves of garlic, smoothly pound
– 2 tsp salt
– 3 tsp sugar
Directions:
– Grind the fish fillet, spices and 50 ml ice water with food processor until it forms lumps.
– Add the rest of the ice water, keep pulsing until the mixture mixs well.
– Add tapioca and tang mien flour, continue pulsing until smooth.
– Shape the fish paste as you like
Cuko
Ingredients:
– 200 gr palm sugar
– 600 ml water
– 25 gr tamarind
– 1 tbsp preserved cabbage (tong cai)
– 5 bird’s eye chili, sliced
– 5 cloves of garlic, lightly broken with a pestle
– 1/2 tsp salt
– 2 tbsp Indonesian sweet soy sauce (I omitted this)
Directions:
– Boil water with palm sugar, tamarind and preserve cabbage until boiled. Keep boiling for around 15 minutes, drained. You can add more water if you prefer.
– Boil again, add garlic and chili, add the rest of the ingredients. Continue boiling until the taste of all the ingredients is absorbed in the sauce.
– Taste and adjust to your own palate.
Note: If you live abroad where spanish mackerel is difficult to find you could replace it with white fish fillet such as; cod or pollack but however the best fish to use is still spanish mackerel.
Source: Ine Sena, Mpek Mpek and Cuko
 Everytime I found a recipe that I thought was interesting and worth to try I always always managed to change them whether it’s slightly or radically. Like this recipe, it supposed to contain squash served on the side but since I was not a fan of squash and lazy to do it I just omitted it. Besides that there were also some other ingredients that I replaced with something else or completely removed. For the original recipe, just click on the link. Everytime I found a recipe that I thought was interesting and worth to try I always always managed to change them whether it’s slightly or radically. Like this recipe, it supposed to contain squash served on the side but since I was not a fan of squash and lazy to do it I just omitted it. Besides that there were also some other ingredients that I replaced with something else or completely removed. For the original recipe, just click on the link.
But all in all my “creativity” paid off, an easy quick yet satisfying meal. And since the food didn’t look that bad to look at, I thought we could also take it to a party or pot luck party, therefore this is my contribution for this month’s Masbar, a virtual pot luck party for Indonesian food blogger. If you would like to join us, do click here
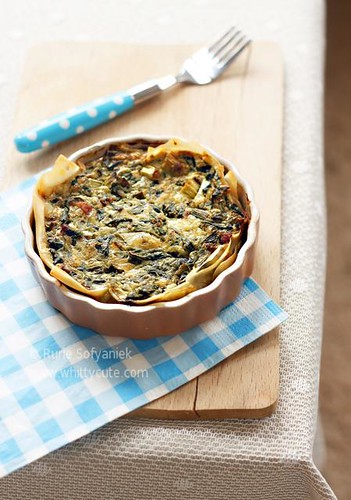
Ingredients:
– 3 eggs, beaten
– 250g tub ricotta (I used garlic cream cheese)
– 200g frozen leaf spinach , defrosted, squeezed dry and chopped
– 1 spring onion , finely sliced
– ½ a 145g tub fresh basil pesto
– ½ a 240g pack SunBlush tomatoes in oil, roughly chopped (omitted)
– 270g pack filo pastry
– knob of butter , melted
Directions:
– Mix together the eggs and ricotta (garlic cream cheese), then add the spinach, spring onion and pesto.
– Heat oven to 180C/160C fan/gas 4. Unwrap the pastry and cover with a just-damp piece of kitchen paper.
– Brush the butter mixture over 1 sheet of pastry, then place in a 23cm tart tin. Brush another piece of pastry with butter and place slightly further around the tin. Keep brushing and lining the tin (keeping the pastry covered when not using) until you have used up the pack and the tin is completely covered. Trim away any pastry overhanging the edges of the tin, then bake for 5-10 mins until starting to crisp. Spoon the spinach mixture into the tin and scatter with the tomatoes. Cook for 20-25 mins moreuntil the tart is set.
Source: www.bbcgoodfood.com
 The first time I read the recipe for this month’s challenge, I cringed. I thought, err what is BSP (Baker’s Percentage). It didn’t look like any normal bread recipe at all. But after consulting the milis, read the article etc, I sort of get what it means. But I really couldn’t explain much, if you like you could go ahead here and have a good reading yourselves. The first time I read the recipe for this month’s challenge, I cringed. I thought, err what is BSP (Baker’s Percentage). It didn’t look like any normal bread recipe at all. But after consulting the milis, read the article etc, I sort of get what it means. But I really couldn’t explain much, if you like you could go ahead here and have a good reading yourselves.What I’m going to share now would be the whole bread making process. I did just as the formula suggested, just reduced the sugar to half amount as I read on the milis that if you put all amount of sugar your bread would be way too sweet, and I didn’t like overly too sweet bread. I also reduced the amount of salt as I felt it was a bit tad too much for my taste.
As I have done many times of kneading bread (or pizza) with barehands many times before, I made this bread with my mixer. It took 15 minutes on speed 3 until the dough passed window pane test. This test I would never know if it wasn’t for KBB, There’s always new things I learned every challenge. If you are wondering what is it all about, just read it here.
Oh I almost forgot one thing, the egg in the recipe called for 38.5 gr which means less than one egg, so as advised on the milis that you could use the whole egg but then you should compensate the other liquid you use which was water. So I did just that, used up the whole egg (60 gr) then reduced the amount of water by 21.5 gr.
Now it’s winter time in Europe but dough likes warm spot in order for them to rise. At first I put my dough on top of the heating, and it worked ok. But then on the second fermentation I put them inside the oven with very low temperature (30celcius). I moved the poor dough because the cats had been eyeing on them since the first time I put it on top of the heating. Other things that I was not sure about was the fermentation time, there were many versions in the explanation and milis. But in the end it came to a conclusion that you shouldn’t let your dough rise twice it’s starting size because then it would be what we call “over fermentation”. So mine was; first fermentation 1.5 hours and second fermentation 45 minutes.
I was a little bit creative actually with the filling, but sorry forgot to take picture of the roti isi (filled rolls). Besides plain dinner rolls I also made some rolls with filling; chocolate, milk and spicy hot tuna. Next time I make this bread I would surely take pictures. My bread turned out beautifully, just 15 minutes in the oven.
And what surprised me the most that after 2 days (I kept some to eat and test the next days) it was still soft and moist. As I made bread before both with and without bread improver this bread was really good for a bread that has got no added chemical besides the yeast itself. YAY to KBB for founding this recipe, another new baking knowledge!
Recipe based on the baker’s percentage:
– 500 gr bread flour
– 9 gr salt (I used 5 gr)
– 38.5 gr granulated sugar (I used 20 gr)
– 31 gr powdered milk (dried milk solid)
– 5 gr instant yeast
– 38.5 gr egg, slightly beaten at room temperature (I used one whole egg 60 gr)
– 38.5 gr butter, room temperature
– 314 gr water (I used 292.5 gr)

Directions:
– Mix together the flour, salt, powdered milk, sugar and yeast in a 4
quart bowl (or in the bowl of an electric mixer). Pour in the egg, butter and water and mix with a large metal spoon (or on low speed of the electric mixer with the paddle attachement) until all the flour is absorbed and the dough forms a ball. If the dough seems very stiff and dry, trickle in more water until the dough is soft and supple.
– Sprinkle flour on the counter, transfer the dough to the counter, and begin kneading (or mix on medium speed with the dough hook), adding more flour, if necessary, to create a dough that is soft, supple, and tacky but not sticky. Continue kneading (or mixing) for 6 to 8 minutes. (if the electric mixer, the dough should be clear the side of the bowl but stick ever so slightly to the bottom.) The dough should pass the windowpan
e test and register 80oF. Lightly oil a large bowl and transfer the dough to the bowl, rolling it to coat it with oil. Cover the bowl with plastic wrap.
– Ferment at room temperature for 1.5 to 2 hours, or until the dough doubles in size (the length of time will depend on the room temperature).
– Remove the fermented dough from the bowl and divide it in half for sandwich loaves, into eighteen 2-ounce pieces for dinner rolls, or twelve 3-ounce pieces for burger or hot dog buns. Shape the pieces into boules for loaves or tight rounds for dinner rolls or buns. Mist the dough lightly with spray oil and cover with a towel or plastic wrap. Allow to res for about 20 minutes.
– Shaping. For loaves, shape like rolling a Swiss roll but pinch the crease with each rotation to strengthen the surface tension. Pinch the final seam closed with the back edge of your hand or with your thumbs. Lightly oil two 8.5 by 4.5-inch loaf pans and place the loaves in the pans. For rolls and buns, line 2 sheet pans with baking parchment. Rolls require no further shaping. For hot dog buns, shape into a pistolet without tapering the ends. Transfer the rolls or buns to the sheet pans.
– Mist the tops of the dough with spray oil and loosely cover with plastic wrap or a towel. Proof the dough at room temperature for 60 to 90 minutes, or until nearly doubles in size.
– Preheat the oven to 350oF for loaves or 400oF for rolls and buns. Brush the rolls or buns with the egg wash and garnish with poppy or sesame seeds. Sandwich loaves also may be washed and garnished, or score them down the centre and rub a little vegetable oil into the slit.
– Bake the rolls or buns for approximately 15 minutes, or until they are golden brown and register just above 180oF in the centre. Bake loaves for 35 to 45 minutes, rotating 180 degrees halfway through for even baking, if needed. The tops should be golden brown and the sides, when removed from the pan, should be golden. The internal temperature of the loaves should be close to 190oF, and the loaves should sound hollow when thumped on the bottom.
– Cooling. When the loaves have finished baking, remove them immediately from the pans and cool on a wire rack for at least 1 hour before slicing or serving. Rolls should cool for at least 15 minutes on a rack before serving.

 Yay it’s one of my favorite food as the theme of this month’s MasBar. I couldn’t eat seafood often in Holland, apart from some types of fishes, seafood are quite pricey. But just the other day I discovered cheap prawns and seafood at the deep-freeze section of the Asian supermarket. However the thing is, they came in a 1 kg box and I couldn’t separate them apart. I got no other choice but to thaw them all and cook them all at once. So I ended up with two kinds of prawn dishes and no one to eat them but me because my better half didn’t like prawns. Uh oh problem again. But I got clever (if I may say so) solution for that. I divided the dish into separate one person portion, and freeze them. So whenever I got I-have-to-eat-prawns-now-no-matter-what moment, I could thaw my treasure from the freezer. Yay it’s one of my favorite food as the theme of this month’s MasBar. I couldn’t eat seafood often in Holland, apart from some types of fishes, seafood are quite pricey. But just the other day I discovered cheap prawns and seafood at the deep-freeze section of the Asian supermarket. However the thing is, they came in a 1 kg box and I couldn’t separate them apart. I got no other choice but to thaw them all and cook them all at once. So I ended up with two kinds of prawn dishes and no one to eat them but me because my better half didn’t like prawns. Uh oh problem again. But I got clever (if I may say so) solution for that. I divided the dish into separate one person portion, and freeze them. So whenever I got I-have-to-eat-prawns-now-no-matter-what moment, I could thaw my treasure from the freezer.
This sate dish is real easy and fast to make, inspired by those beach side seafood cafe in Jimbaran, Bali. Though it would be nicer if you could marinate the prawns overnight in the refrigerator before grilling them. Don’t forget your hot steaming rice and sambal kecap (or any other sambal of your choice).
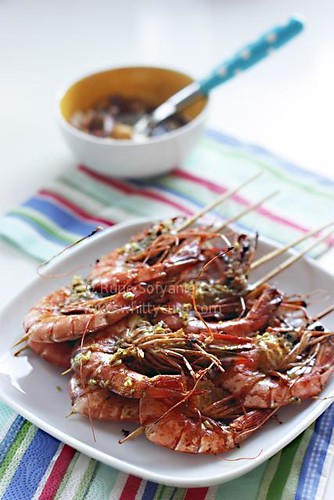
Serve 5 persons
Ingredients:
– 500gr prawns, head peeled and deveined (though I didn’t devein them, lazy T.T)
– 1 lime
– 8 garlic
– 8 cm turmeric, peeled
– 4 candlenut, panbroil
– 1 tsp coriander
– 2 cm ginger
– Salt
– Pepper
– Some vegetable oil
Directions:
– Squeeze lime juice over prawns and set aside for 30 minutes, drained.
– Grind garlic, turmeric, candlenut, coriander, ginger, salt and pepper until smooth, mix with little bit of vegetable oil.
– Smear over prawn and marinate overnight.
– Arrange prawn on the sate skewers and grill each side until done.
– Serve warm with sambal kecap.
Sambal kecap:
– 4 bird’s eye chili (less or more depending on your taste buds), sliced
– 1 shallot, chopped coarsely
– 1/4 tomato, chopped coarsely
– Some lime juice
– Some kecap manis (Indonesian sweet soy sauce)
– Some kecap asin (soy sauce)
Source: Me
Yuuuhuuu…..
Berhubung hasil polling bulan kemarin seri antara Bento dan Masakan Indonesia Berbahan Dasar UDANG, maka untuk memenuhi permintaan penggemar, maka bulan ini tidak perlu lagi diadakan polling dan hasilnya merujuk pada hasil polling bulan lalu. Berhubung pada bulan lalu udah bikin BENTO, maka bulan ini temanya adalah Masakan Indonesia Berbahan Dasar UDANG.
Gimana temans, Udah siap dengan menu andalan kalian???
Yuk mari belanja udang dari sekarang… 🙂

Caranya Ikutan:
Posting hasil memasak sesuai dengan tema [Masakan Indonesia Berbahan Dasar Udang] & pada jadwal yang sudah ditentukan [16-30 NOVEMBER 2009]
Postingan dilengkapi dengan Logo Masak Bareng
Kirim datanya ke e-m@il Masak Bareng di masakbarengyuuk[at]gmail[dot]com, berupa:
* Nama
* Nama Blog
* Nama masakan & URL-nya
* 1 buah foto hasil masakan
Info tambahan:
Tentang resep, tidak ada aturan baku. Dipersilahkan browsing dan tidak tertutup kemungkinan untuk berkreasi sesuai selera.
Tapi sebaiknya menyebutkan sumber resep yang digunakan.
Bahasa yang digunakan saat posting juga tidak perlu sama, mau pake English atau bahasa lainnya juga boleh.
Tema menu, Polling, dan Jadwal posting bulan berikutnya akan diumumkan setelah penayangan Round up Masak Bareng.
So, sempatkan aja melihat-lihat update beritanya.
Oia, kalau mau kasih ide tema masakan juga boleh… silahkan isi SB di samping atau tulis di wall Facebook MasBar yaaa…
Jangan lupa kalo udah naik tayang, kasih kabar ke kami (silahkan isi SB) & ke foodie blogger lainnya.
Ditunggu partisipasinya ya….
Masak Bareng Yuuk…
 Huhuhu….nowadays it seem’s that my food blog only up and about when there’s foodie blogger event such as this one Masbar. Please laziness, get away from me…… Huhuhu….nowadays it seem’s that my food blog only up and about when there’s foodie blogger event such as this one Masbar. Please laziness, get away from me……
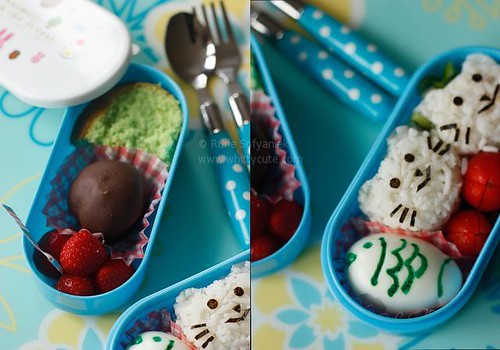
Talking about bento, I used to post many bentos like ages ago. I do still make them daily but not these cutey bento so don’t bothered to take pictures anymore. So I dig really deep into my bento making kit box and glad that I still found nori and the egg moulder.

Let’s see what I have here for my simple bento; steamed rice with cat shape (Romy and Whitty indeed), boiled egg with the shape of fish, 2 tomatoes, sliced spring onion. Hmm I think my bento was lacked of greenery aka salad leaves etc, but sob sob I didn’t have it on my hand.
Then on the other box I have; some strawberries, pandan chiffon cake and choux pastry covered in chocolate. Hmm yummy.
Moga postingan ini cukup berkenan buat ibu2 masbar berhubung postingannya sederhana banget…..hihi.
 Hip hip hoera, Happy 2nd Birthday KBB!!! Semoga KBB makin jaya dan selalu jadi tempat kita semua untuk belajar baking sama2. Hip hip hoera, Happy 2nd Birthday KBB!!! Semoga KBB makin jaya dan selalu jadi tempat kita semua untuk belajar baking sama2.
There were actually 2 competitions that we could enter as the KBB member but I’m really sorry I could only enter 1 which is the food photography competition.

For recipe click here. I just changed the lemon glaze into strawberry.
|
Awards
 My First Award, Thank You!
Whittycute Foodie Event
 Click here to see the round up!
|


